Showing posts with label Sewing. Show all posts

Monday, April 9, 2012

Upcycled Skorts

Hello!  I hope you enjoyed Easter.  We had a wonderful Easter morning, church service, and lunch.  Then the rain came.  But that's ok - we can use the rain.  I will admit, after all the tornadoes that came through last week, I am a little weary!  The tornado that hit Arlington close to I-20 is only miles from my home. Scary, huh?  There was a lot of damage, but miraculously there were only minor injuries and NO fatalities!  Thank you, God!
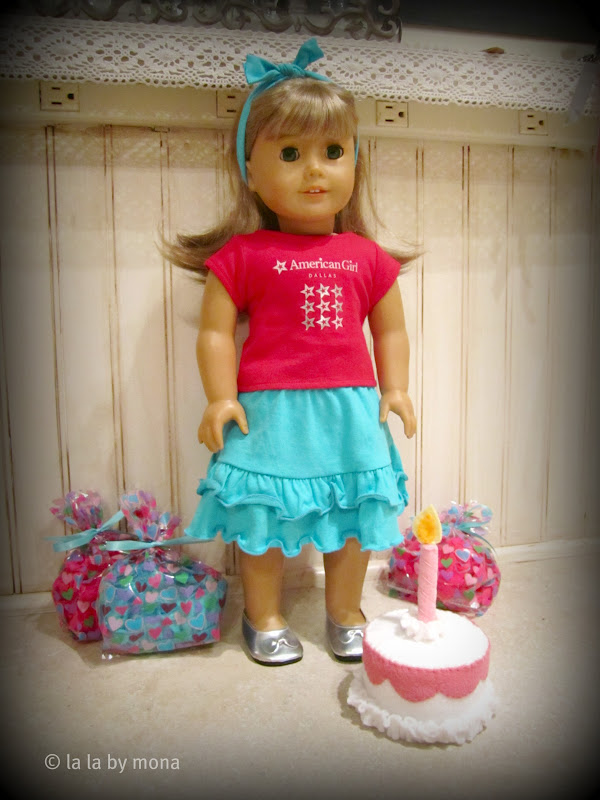

Today I wanted to share another upcycling project with you.  I took two pair of skorts that  my daughter never wore from last summer and turned them into four skirts for 18" dolls!  Keep in mind that these were done quickly and the night before my daughter's birthday party at the American Girl doll store.  I wanted to make skirts for her friend's dolls as party favors.  They turned out just as cute and the girls loved them.  So, here we go.

Before and after.... you can see the size 5T pink skort and the upcycled blue doll skirt.


1.  Take the skort apart - cut off the waistband (the shorts will come out, too); then cut the skort straight down the middle and straight down the back.  This leaves one finished side seam already sewn.


2.  Cut off any excess from the top of the skort to the desired length needed for the doll skirt.  Leave about 1" extra for the waistband.  No exact measurements here, just eyeball what you like!


3.  This is the skirt after cutting and trimming.  We are now ready to add the elastic for the waistband.


4.  Using a 10" length of 1/4" elastic, find the middle of the elastic and pin that to the middle of the top of the skirt (on the inside).


5.  Now pin the elastic to each side of the skirt.  In the photo below, the material has been stretched out for a visual.


6.  You will now sew the elastic to the material.  Tack down the material to hold the elastic in place.  Hold the material at the middle pin with one hand and stretch out the elastic to the width of the material (from the top pin to the middle pin).  Only stretch the elastic, taking care not to stretch the fabric past its regular width.  Stitch down the elastic using a zig-zag stitch.  Continue with the other half of the skirt using the same steps above.


7.  When finished, the elastic will go back to its original length, drawing the material up.

 8.  This is what it will look like from the right side.


9.  Fold the elastic over toward the wrong side and pin to hold in place.  Using a straight stitch, sew the elastic in place, stretching the material out slightly as in the steps above.


10.  Shown after sewing the elastic down.  It isn't as finished as making a casing, but it is quick and the doll doesn't care!


11. The right side after sewing the elastic down.  Okie dokie, eh?


12.  The last step is to sew the sides together.  (Sorry, no photo.)  Pin the wrong side of the skirt sides together.  Sew together using a straight stitch.  You can use a zig-zag stitch down the side or serge to finish. 

All done!


I loved these particular skorts because of the ruffles.  Less work for me and so cute for the doll!


I hope you enjoyed the project and have lots of fun making your own.  I would love to see photos so be sure to email them to me!
Pin It

Tuesday, March 13, 2012

My baby girl's quilt

Well, I finally finished my baby girl's quilt... and I'm finally posting some pictures!  I really enjoyed making this quilt as I pushed myself to try some new techniques.  And even though I took forever in working through the process in my mind, drawing it out, taking notes, scribbling pictures, and so on, I still made a big mistake!  There is something to be said for planning, but I think diving right it might have worked just as well.  But, I was able to correct the mistake and it all worked out.


I used the GO! Baby machine I won from AccuQuilt to cut most of the flowers for this quilt.  When I was asked what dies I would like to choose, I specifically chose two of the dies for this quilt.  The little machine worked like a charm, too.  My baby girl even helped me cut out some of the flowers.  I used Lila Tueller's Soire'e fabric charm packs that were given to me a while back.  It was perfect for this project.


I used Bari J. Ackerman's book, "Inspired to Sew" for instruction and inspiration.  It is a wonderful book with lots of great projects.  Love, love, love it!  After I got the foundation of my quilt in order, I placed all of the flowers and leaves where I wanted them and pinned, pinned, and pinned!  Then, I used free-motion quilting to sew them on.  It did take some time, but I thought it was well worth it.  I found that using a fabric glue stick helped keep the pieces in place as I moved around.  I kept some pins in place except for the immediate pieces that I was sewing so that as I went along, I could reposition pieces as needed.  It also alleviated the hassle of trying to sew around the pins. 


Below are some of the close-ups where you can see a little more detail.  I wasn't too picky about perfect applique here.  I just moved all around at a fairly even speed and tried to make sure all the pieces were sewn down well.  I enjoyed making the bark on the trees, the clouds, and the grass.


I also added a few dimensional pieces to the center of some of the flowers.  One of my favorite parts to this quilt is the bunting.  I love the way it pops right off of the quilt!


The big blunder I made?  I didn't sew the border on to my quilt top!  When I finished all the quilting and started to make my border, I realized this.  I had to sew on additional batting so that I could add my border.  But, like I said, it worked out okay because I decided to add a ruffle and facing strip to the back.  Several new techniques later, and I was happy!


This is the back of the quilt.  I like the way it looks, too.  Fun.


And, here is baby girl's room.  I made the quilt to the dimensions of the width of the mattress and a little bit shorter to allow for the pillow (and a billion stuffed animals), but wished I had made it a little bit longer and wider.  I'm not sweating it now, though! I guess I better get busy on a pillow sham... and I think it might be time to put away the flannel snowflake sheets!


I'll come back soon to share a little more about the tree in her room.  Thanks for stopping by! Pin It

Thursday, December 29, 2011

Upcycling for Jessica

My daughter had several t-shirts from Target that she never wore.  Now they are out of season and will be too small to wear next summer.  I decided though, to upcycle them for her doll, Jessica.  I kept a few other t-shirts that were well worn also just in case I needed a little bit of knit fabric for embellishments.


These are some of the t-shirts I had to choose from.  One great thing about using children's t-shirts is that you already have several finished hems and seams to use.  Less work = more time = more goodies!


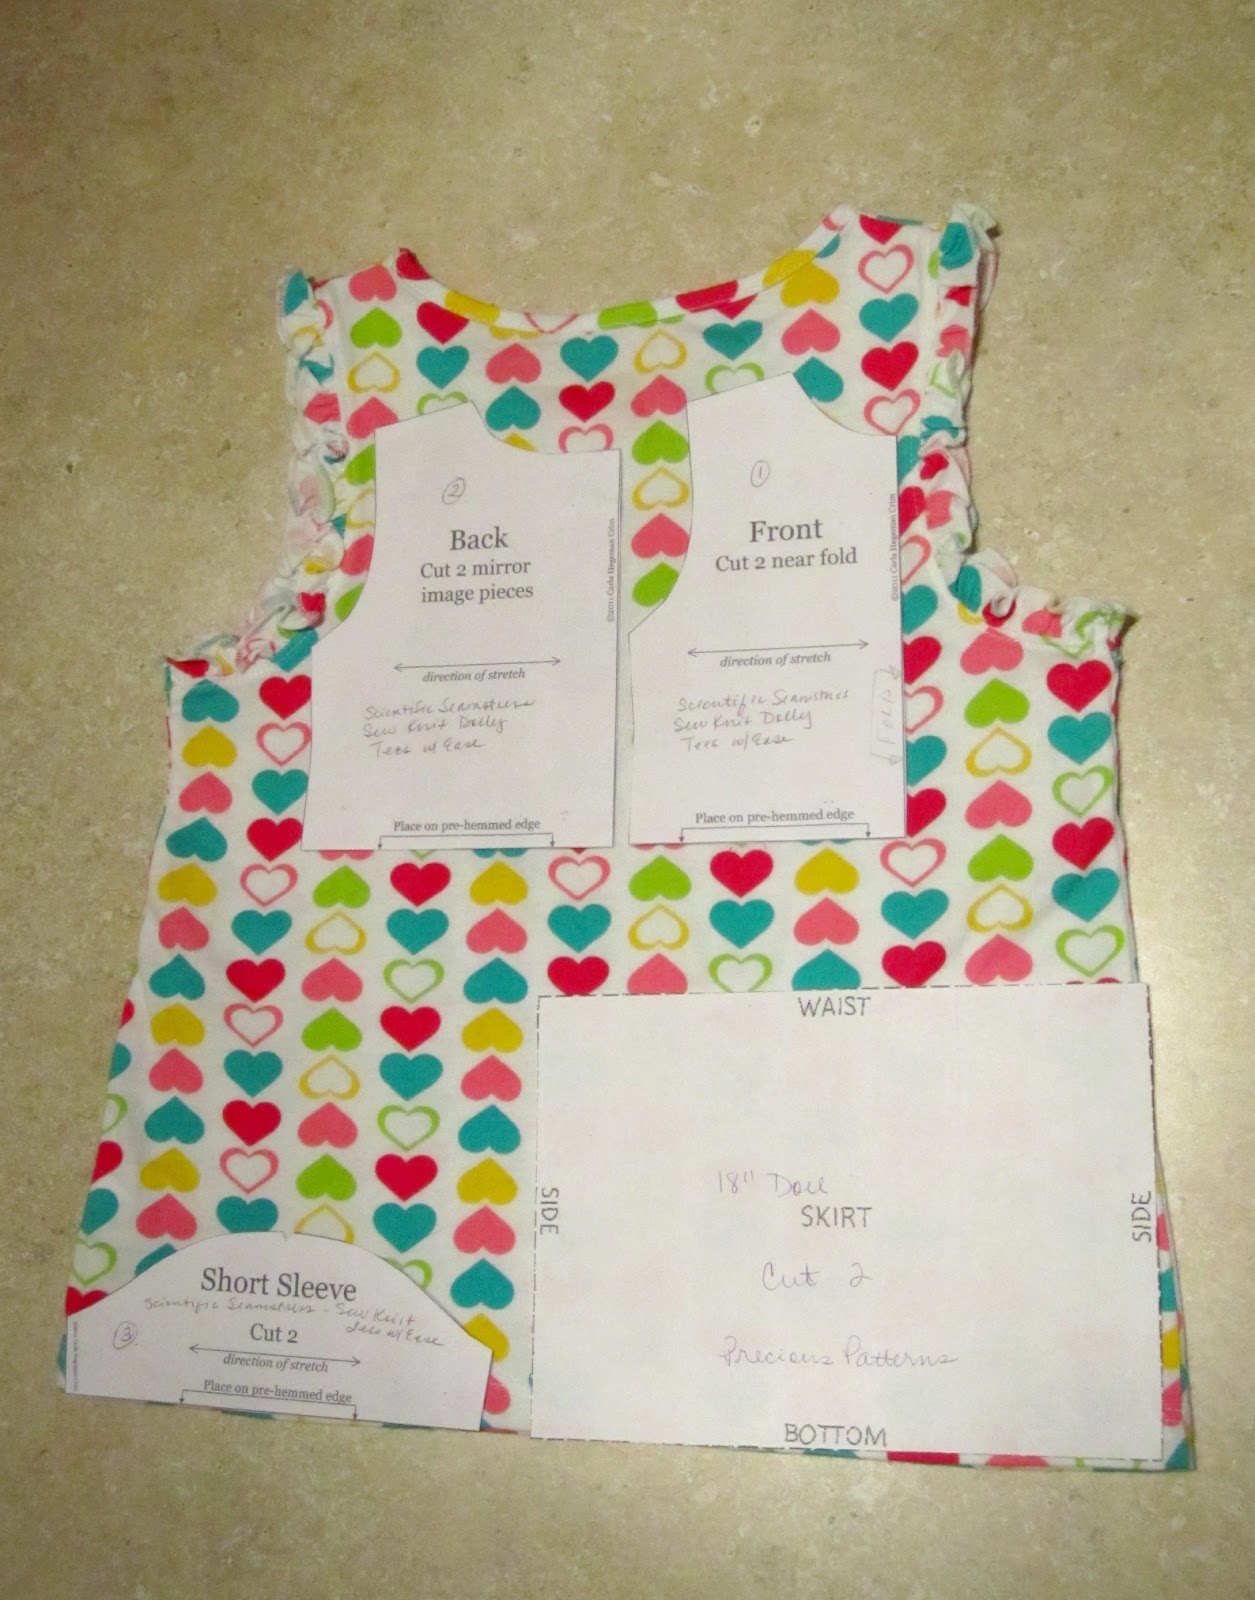
Below you can see that I was able to make a full short-sleeved t-shirt and a skirt from just one 5-T top.  The pattern I used is from the Scientific Seamstress and you can find it here.  She has other great patterns that I can't wait to try out.

As you can see, her pattern uses finished hems, which she shows you how to quickly make if you are using regular, unsewn knit fabric.  However, I just made use of what I had.  I deconstructed the top, and kept the ruffled pieces for later.  Since the top only has one hem to utilize, I chose to use it for the doll skirt and sleeves.  I just added length to the bottom of the doll top pieces and hemmed them separately. 


I loved the little flower on the 5-T top, so I cut it out and sewed it on to the doll skirt I made from the same top.  The lime-green stitching at the bottom along with the flower is so cute!  I don't think it shows up too much in the photo, but this little top was worn often by my daughter!  But, it has a new home and use and she loves it just the same.  So, don't overlook the gently used clothing you may already have to work with.


I added some trim to this little pink skirt and this little outfit actually went to my daughter's best friend for Christmas.


Another little skirt for Jessica...


The pink t-shirt had the sweetest little sleeves so I cut those out carefully and used them for doll sleeves.


Out of three t-shirts, I was able to make three skirts and two tops in just a few hours.  Hopefully soon, I will have time to use the yellow and green t-shirts to whip up a few more outfits.  


I hope you enjoyed visiting today.  Maybe this post has inspired you to upcycle some of your clothing into "new" fun things!  I'll be back soon to show you a quick method to make a doll skirt.
Pin It

Saturday, September 17, 2011

This Funk I'm In

I'm in a creative funk!  Not the type where I'm coming up with absolutely nothing.  The type where I'm on total creative overload.  It finally felt a little like fall this past week and we even had some rain (thank you, Father!).  I'm ready to pull all of my fall decorations out.  I'm ready to sew.  I'm ready to create.  Ideas are everywhere and I've got the goodies to work with.

So what's the problem, you ask?  I can't focus!  What do I want to do?  What should I start with?   I keep hearing about Pinterest, but that would only make things worse at this point.  Maybe later.  It looks so fun but I will have to save that for another time.  Getting my daily fix of blogs is not helping either.  So many fun things to create and so little time!  Sigh...

However, amidst a soccer game for baby girl today, a little housework, and laundry today, I did manage to get one thing done.  Nothing spectacular or creatively fulfilling, but much-needed.  Remember this?


Well, now it looks like this:


Hey!  Who the heck left that water stain on it?  Anyway, I made another ironing board cover and also had to replace the quilted lining as it was as flat as the proverbial pancake from all the ironing.  So, taaaadaaaah!  If I can get a year and a half out of this one, too I will be pretty satisfied! 


I need to make a list I suppose of some of my ideas and try to get a grip.  I made these little guys last year...


... but they need some company.  I'm dying to make these pretty little babies - I just need to find some luscious silk velvet.


I bought more fabric and trim the other day.  I've been breaking the rule - "Don't buy more fabric until you sew with what ya got".  It's fabric - I don't need to explain myself here, do I?  Yeah, I didn't think so.  I've got several dresses and skirts I would like to make, as well as a new table runner, a banner, and baby girl's quilt.  See what I mean?  Another little sigh...

I'm off to make that list now!  Have a wonderful Sunday!
Pin It

Wednesday, September 14, 2011

Pure Genius!

I stumbled upon this today...


... from the blog of the Scientific Seamstress.  I love it.  Not sure how I missed this so many months ago.  Huh.

And, note that "Fe" is for Iron which is the only element that I actually remembered from 10th grade chemistry.  SEW funny (and ironic)!  Ha!  That was funny, too!  I crack myself up.
Pin It