Wednesday, January 20, 2010

I'm goin' old spool!

This is certainly nothing new, but I finally took a few minutes the other day to reorganize some ribbon and trim.  I just wrapped some of them around some old wooden spools I have had for several years. 


They certainly are much prettier this way.  Now, will I actually take them off and use them?!

Mona
Pin It

Tuesday, January 19, 2010

Garment Label Tutorial

When I decided to open my Etsy shop and sell some of my handmade garments, I wanted them to look professional and finished.  I researched garment labels and found all kinds.  However, some were very expensive or had to be purchased in large quantities.  Others were less expensive but were limited to a few specific fonts or designs.  I also found some tutorials on how to make labels at home using fabric sheets and ink jet printers.  I had printed out designs with my printer and sewn them to garments before, but did not like the way the fabric looked after several trips to the washer.

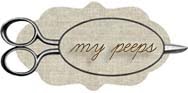
I was also looking into having some stamps made that I could use for envelopes, letterhead, etc.  Then it occurred to me that I could also use those stamps to make my garment labels.  I worked on the designs myself and then sent them to an Etsy shop, Scribbling Club.  Within two weeks, I had wonderful clear rubber stamps that were mounted on acrylic blocks.  I like these because the stamps and blocks are clear which aides in viewing and alignment and they are re-positionable.  The price was affordable and I can use the stamps for a number of other projects.


I first stamped on silk ribbon and grosgrain.  I had varied results depending on the type of ribbon.  Sometimes the ink would bleed or just not leave a very bold impression.  However, using ribbon is nice because it is neat and tidy and readily available in many styles, colors, and sizes.  You just have to experiment with it.

I then tried stamping on muslin and Osnaburg and the impressions looked great.  I used Memories' Acid Free Dye Inkpad in Sepia.  Black works well also, but I found that lighter colors such as pink and blue did not show up as well.  Stamping on material is very versatile and allows you to make stamps of much bigger sizes than  most ribbon would allow.

So after experimenting a little, this is what I came up with.  

Materials
Iron
100% cotton fabric (natural fibers) – I used unbleached muslin
Stamp – clear rubber stamp mounted on an acrylic block
Waterproof ink stamp pad – such as Memories, Versacraft, Fabrico
Glue stick - optional


1.  Pre-wash your fabric.

2.  From about 2 to 3 inches from the edge of the fabric, cut a small slit using scissors and then tear a strip from selvage to selvage to form a straight edge on the grain line.

3.  Now that you have a straight edge, make another cut about ¾” to 1” (or to the size of your stamp) and tear another strip.  You will stamp your labels on this strip.

4.  Iron the strip of material with steam to get it nice and flat.  Cut off any frayed threads.

5.  Using your stamp and ink, stamp the fabric leaving approximately 1 to 2 inches between each impression.


6.  After stamping the entire strip, let the ink dry thoroughly.

7.  Once dry, you can heat-set the ink by ironing with a dry iron over the front and back of the material.  For best results, let the labels sit for about a week before washing.


Your fabric garment labels are now ready to use!  I left my labels uncut and wound the strip around an old wooden spool.  I can just cut them as needed.


The labels can either be sewn to the garment or ironed on using fusible webbing.  To sew the label to the garment, cut the label to the desired size.  Do this just before sewing to the garment to avoid fraying or apply Fray Check to each edge of the label and let dry.  Sew a straight stitch around the four sides of the label close to the edge.  I dab the back of the label with a glue stick to keep the label in place while sewing. I used brown thread so it would show up better in the photo, but I use ivory when sewing the labels to the garment.


If fusing the label to the garment, fuse the webbing to the back of the label leaving it slightly larger than needed.  Once the webbing is fused to the back of the label, cut the label to the desired size and fuse to the garment.

I also used my Etsy shop stamp with the same method above and then sewed it onto a paper hang tag.  The tag can then be embellished and used as a “thank you” note to my Etsy customers.  Which leads me to my next tutorial - sewing on paper… stayed tuned!


I hope you found this tutorial useful.  Please feel free to contact me if you have any questions.  I welcome any suggestions and would love to see what you’ve done with your fabric and rubber stamps.

Happy stamping,

Mona
Pin It

Sunday, January 17, 2010

Are you ready to celebrate.... LOVE?

I absolutely love to decorate for the holidays but am world's worst about preparing early.  I have lots of great ideas floating around in my head and things stashed away. But, sometimes it creeps up on me and I miss the opportunity.  So I am going to start working on some Valentine's projects soon.


It is such a sweet holiday (pun intended) and the colors are so fun to work with!  I love to see how everyone in blog land decorates for Valentine's.  While browsing this morning I ran across Linda's blog - Robin's Egg Blues.  Such a pretty palette!  And she is having a another generous giveaway!   I'm crossing my fingers!


So, let me know what you most like about Valentine's day.... making cards for the kids to send to school, shopping for candy, sewing, eating candy?  And, do you have any projects in the making?  I will be working on a project this week and plan to share a tutorial!

Sew sweet,

Mona Pin It

Saturday, January 16, 2010

Baby Charlie

I'm on my way to a baby shower for a girl friend of mine.  I can't wait!  I just love babies and baby stuff.  I hope I get to babysit and hold little "Charlie" while he's tiny and smells all baby-powdery!  Of  course, that is always dangerous - then I get baby fever!

Anyway, my friend has a baby animal farm theme and it is just so cute.  While at JoAnn's, I lucked out and found the perfect ensemble of fabric to make the gift.  I love it when that happens!  They even had some patchwork fabric with everything in it.  I just backed it with the matching flannel and tied little knots here and there to keep it from shifting.  Easy to do while watching "Big Love" last night!


I made two bibs with his little name (I hope you are in fact a boy, Charlie!), two burp cloths, a hooded towel, and a blanket.  Fun stuff!


And, having an hour to myself, I ended up at JoAnn's again - go figure.  I found some beautiful, vibrant material (the pictures here don't do it justice) and thought I would sew some more of these goodies up and list them on my Etsy store.  I think these would look so sweet all wrapped around a pretty baby girl!  I'm also envisioning a sweet little girl's skirt from this material.  The lime green and floral has such a sweet vintage feel to it.  It reminds me of shabby bed linens.


Well, I'm off to the baby shower.  I hope you all have a fabulous weekend!

Sew happy,

Mona Pin It

Wednesday, January 13, 2010

Lemme give you some advice...

Ever have one of those projects that in the beginning seemed simple, even when you knew it would involve a little elbow grease?  Like, "Honey, I think I'll paint the kitchen this weekend."  Easy enough, right?  Ha!  This is the scenario I created in my own little world..... (insert tingly, time-transporting music and a fade-out)

  • Pick the color.
  • Buy the paint and supplies.
  • While the kids have all gone off to clean their rooms and do homework, skip around the kitchen like Cinderella singing and painting.
  • Clean up, wash-off, make dinner.

Here's how it really goes down...

  • After three months and repeatedly mentioning it to "honey" and the best friend, finally decide to buy the paint and supplies.  Get several rolls of blue painter's tape - why mess with trying to be neat, you just gotta get in there and paint.
  • Look at the paint in the garage for about four or five days.
  • Put it on the to-do list with a "definite" date.
  • Put it off for two more days because the poor kids came down with a stomach bug.
  • Jump in on Saturday with a "Let's do this!" attitude.
  • Take plates, pictures, and light switch covers down.
  • Pull out nails.
  • Get out supplies.
  • Notice that the blinds sure could use a good cleaning.  And the lace curtains.
  • Clean the blinds.
  • Take them down and realize the hardware needs to come down also.
  • Go get more tools to take blinds down.
  • Wash curtains. 
  • Ask "honey" and the kids to go find something else to do besides be in the kitchen.
  • Start taping - everything you don't want painted.
  • Time for lunch. 
  • Clean up from lunch.
  • Decide that's boring and begin to paint.
  • Time for dinner.
  • Clean up from dinner.
  • Paint.
  • "Honey, do you think this yellow is too lemmony?  I was going for light buttery."
  • Move stuff around as you paint (Use kitchen chairs lined up in a row to move back and forth.  Who needs a ladder?)
  • Repeat two more times - it needs three coats!
  • Get excited and pull off painter's tape as I go.  Validation.
  • Yell at "honey" and the kids to pleeeeeease go find something else to do besides be in the kitchen.
  • Partially take down light over the sink so I don't have to tape around it and hope I can re-hang it later.
  • Get about half of the walls done and give it up for the night.
  • Spend 30 minutes getting paint out of the roller.
  • Start over the next day.  "I'm jammin' now!"
  • Move more stuff around.
  • Tape.
  • Paint.
  • Un-tape.
  • Move refrigerator - "Holy mother of ?!"
  • Clean behind refrigerator.
  • Time for lunch.
  • Clean up from lunch.
  • Continue, always looking at what's been painted, not what still needs painting.  That's like looking down when your afraid of heights.
  • "I didn't realize I had this much paintable space.  Huh."
  • Finally finish, rip off the tape, step back and pat myself on the back.... a lot.
  • Clean up.
  • Replace hardware for blinds.
  • Re-hang blinds.
  • Re-hang curtains.
  • Re-hang light over sink.
  • Replace light switch covers.
  • Put tools away.
  • Breathe.
  • Go to bed - tomorrow is Monday again.

So, my advice is this.... If at all possible or feasible - hire a contractor, ship off the kids, go to a B&B for the weekend, and come back when its been taken care of!  I love to do this kind of work myself, really I do.  But, somewhere in between projects I tend to forget the reality of it!!!

Previous wall color (my Martha Stewart years):


A little bit of all the colors (looks like a 1980's Benneton ad!)  I told you I like to use blue painter's tape.


New color!  So cheerful and a little whimsical.  See my new high-dollar Target dishes?  Happy Birthday to me, ya'll!


Now that my kitchen is all perky and happy, I have a problem.  I have committment issues - about putting things back up on the walls.  "Should I put this back here?  Or mabye over here?  Maybe just give it away and start over.  A new chandelier?  I'll look online.  That's silly.  I'll just wait......"  So, I've been brainstorming and trying to come up with some new things to do, make, try out.

Let me know if you have projects like this... or am I the only one?!

:) Mona Pin It

Tuesday, January 5, 2010

Happy Birthday... to me!!!

Anyone who knows me well also knows that I LOVE to celebrate my birthday.  Yeah, yeah - another year older, but I think older and better!!  Whatever it takes, right?  Anyway, its MY day and I just skip through it like a child.

So, today I was going to indulge myself in a lovely breakfast at La Madeleine's and then go shopping!  A sweet friend ended up joining me and bought my breakfast - even though she is trying to eat healthier.  She is so thoughtful - thanks Stephanie!


So it all goes back to 2:53 p.m. on this very day (some odd years ago that you don't need to know exactly).  "Wow, what a pretty baby!"  (I know you're making a face right now, its okay!)  And thanks to my mom, Sue for keeping me anyway!  I love you Mom!

Off to celebrate some more!

Mona Pin It